1. Choose Submission Type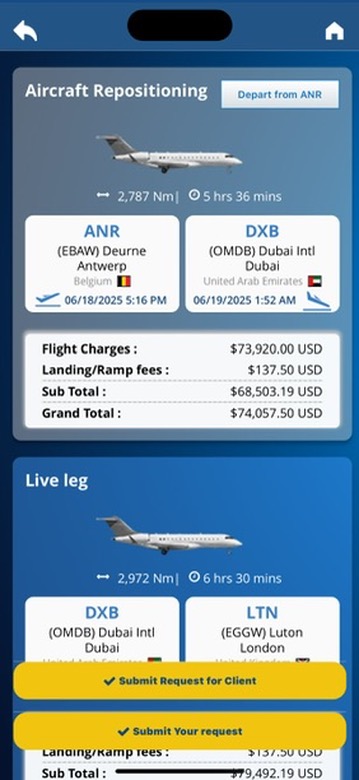
When creating a trip, select “Submit in your name” or “Submit for a client.”
– To act as broker and set your markup, always choose “Submit for a client.”
2. Select or Create Client
📌 Existing client?
• Search and select them; their account will be automatically linked to you as the broker.
📌 New client?
• Add their details; once created, they’re also automatically assigned to you—whether you initiate the trip or they come to AirCharter directly.
3. Submit Trip to AirCharter
• Hit Submit to send the trip request to the AirCharter team.
• You’ll receive a Trip Number confirming the submission.
4. Trip Processing & Market Sourcing
• We source aircraft (on‑market and off-market) to prepare at-cost quotes—no markup included.
• Once quotes are ready, you receive an email notification.
5. Review in Mobile App
• In the app, find the trip: the Details button is yellow, indicating quotes are ready.
• You’ll also see how many offers are ready and pending.
6. Add Your Markup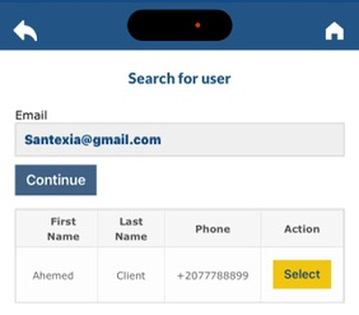
For each offer:
• Tap the yellow Details button
• Enter your markup
• Tap Update to apply
7. Send Compiled Quote to Client
• After marking up each offer, tap Send Quote to email the individual quote to your client.
• Repeat for every offer.
8. Quote Complete & Visible to You
• Once sent, the Details button turns blue—quotes are finalized.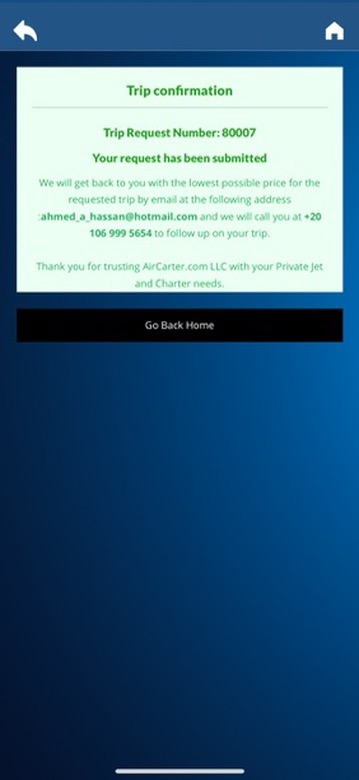 • The app shows Gross Profit, visible only to you—not to the client.
• No pending offers remain.
9. Client Experience
The client receives an email with:
• The quote(s), showing your name & contact info
• A link to view/book the trip in their app or the website
The contract ready for booking
Submitting a Trip: Broker vs. Client Mode
When you create a new trip, you will be prompted to choose whether to submit it in your name or on behalf of a client.
To add your own markup and act as a broker, you must select “Submit for a client.”
Once submitted:
• That client will be permanently assigned to you, whether you initiate the trip or they contact AirCharter directly in the future.
• You will always be notified when it’s time to review the trip and will be given the opportunity to set your markup and send the final quote to your client.
This ensures that you retain full control over your margins and maintain ownership of the client relationship.
🔄 Trip Submission Workflow (Client Mode)
-
Client Account Check
When you select “Submit for a client,” the system will first check if the client already has an account with AirCharter.com. -
Existing Client
If the client exists, simply select them. From that point on, their account will be linked to you as their broker. -
New Client
If the client doesn’t exist, add their information.
This new client will be permanently assigned to you — whether you initiate the trip or they contact AirCharter directly.
You will always control the markup and send them their quotes. -
Submit Trip
Once the client is selected, submit the trip to the AirCharter Team.
You’ll receive a trip number as confirmation. -
Market Sourcing
Our team will search across on-market and off-market sources to find the best aircraft options.
We’ll prepare the quotes and send them to you at cost with zero markup. -
Notification
You will receive an email alert as soon as the trip is ready for quoting.
📲 Quoting & Sending Offers to Your Client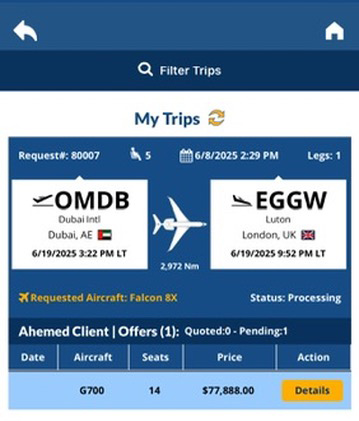
-
Access the Trip in the Mobile App
Open the mobile app and navigate to your trip.
You’ll see a yellow “Details” button — this means the quotes are pending markup and not yet ready to be sent.
You will also see how many offers have been received and how many are still pending. -
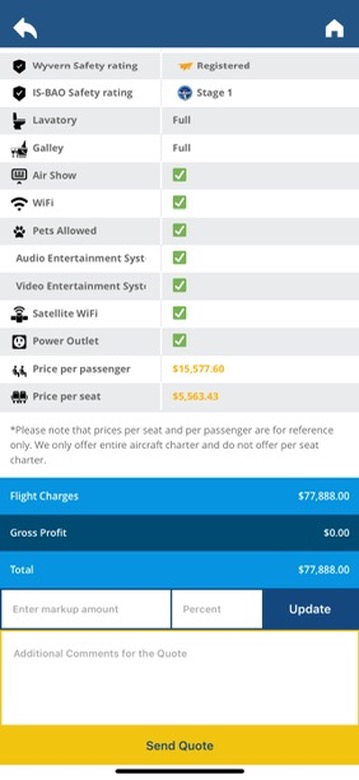
Set Your Markup
Tap the yellow “Details” button for each available offer.
• Add your desired markup
• Tap Update to save your margin on our system
-
Send the Quote
After setting your markup, tap “Send Quote” to email the quote to your client.
🔁 Repeat this process for each offer received you want to send. - Client Receives the Quote
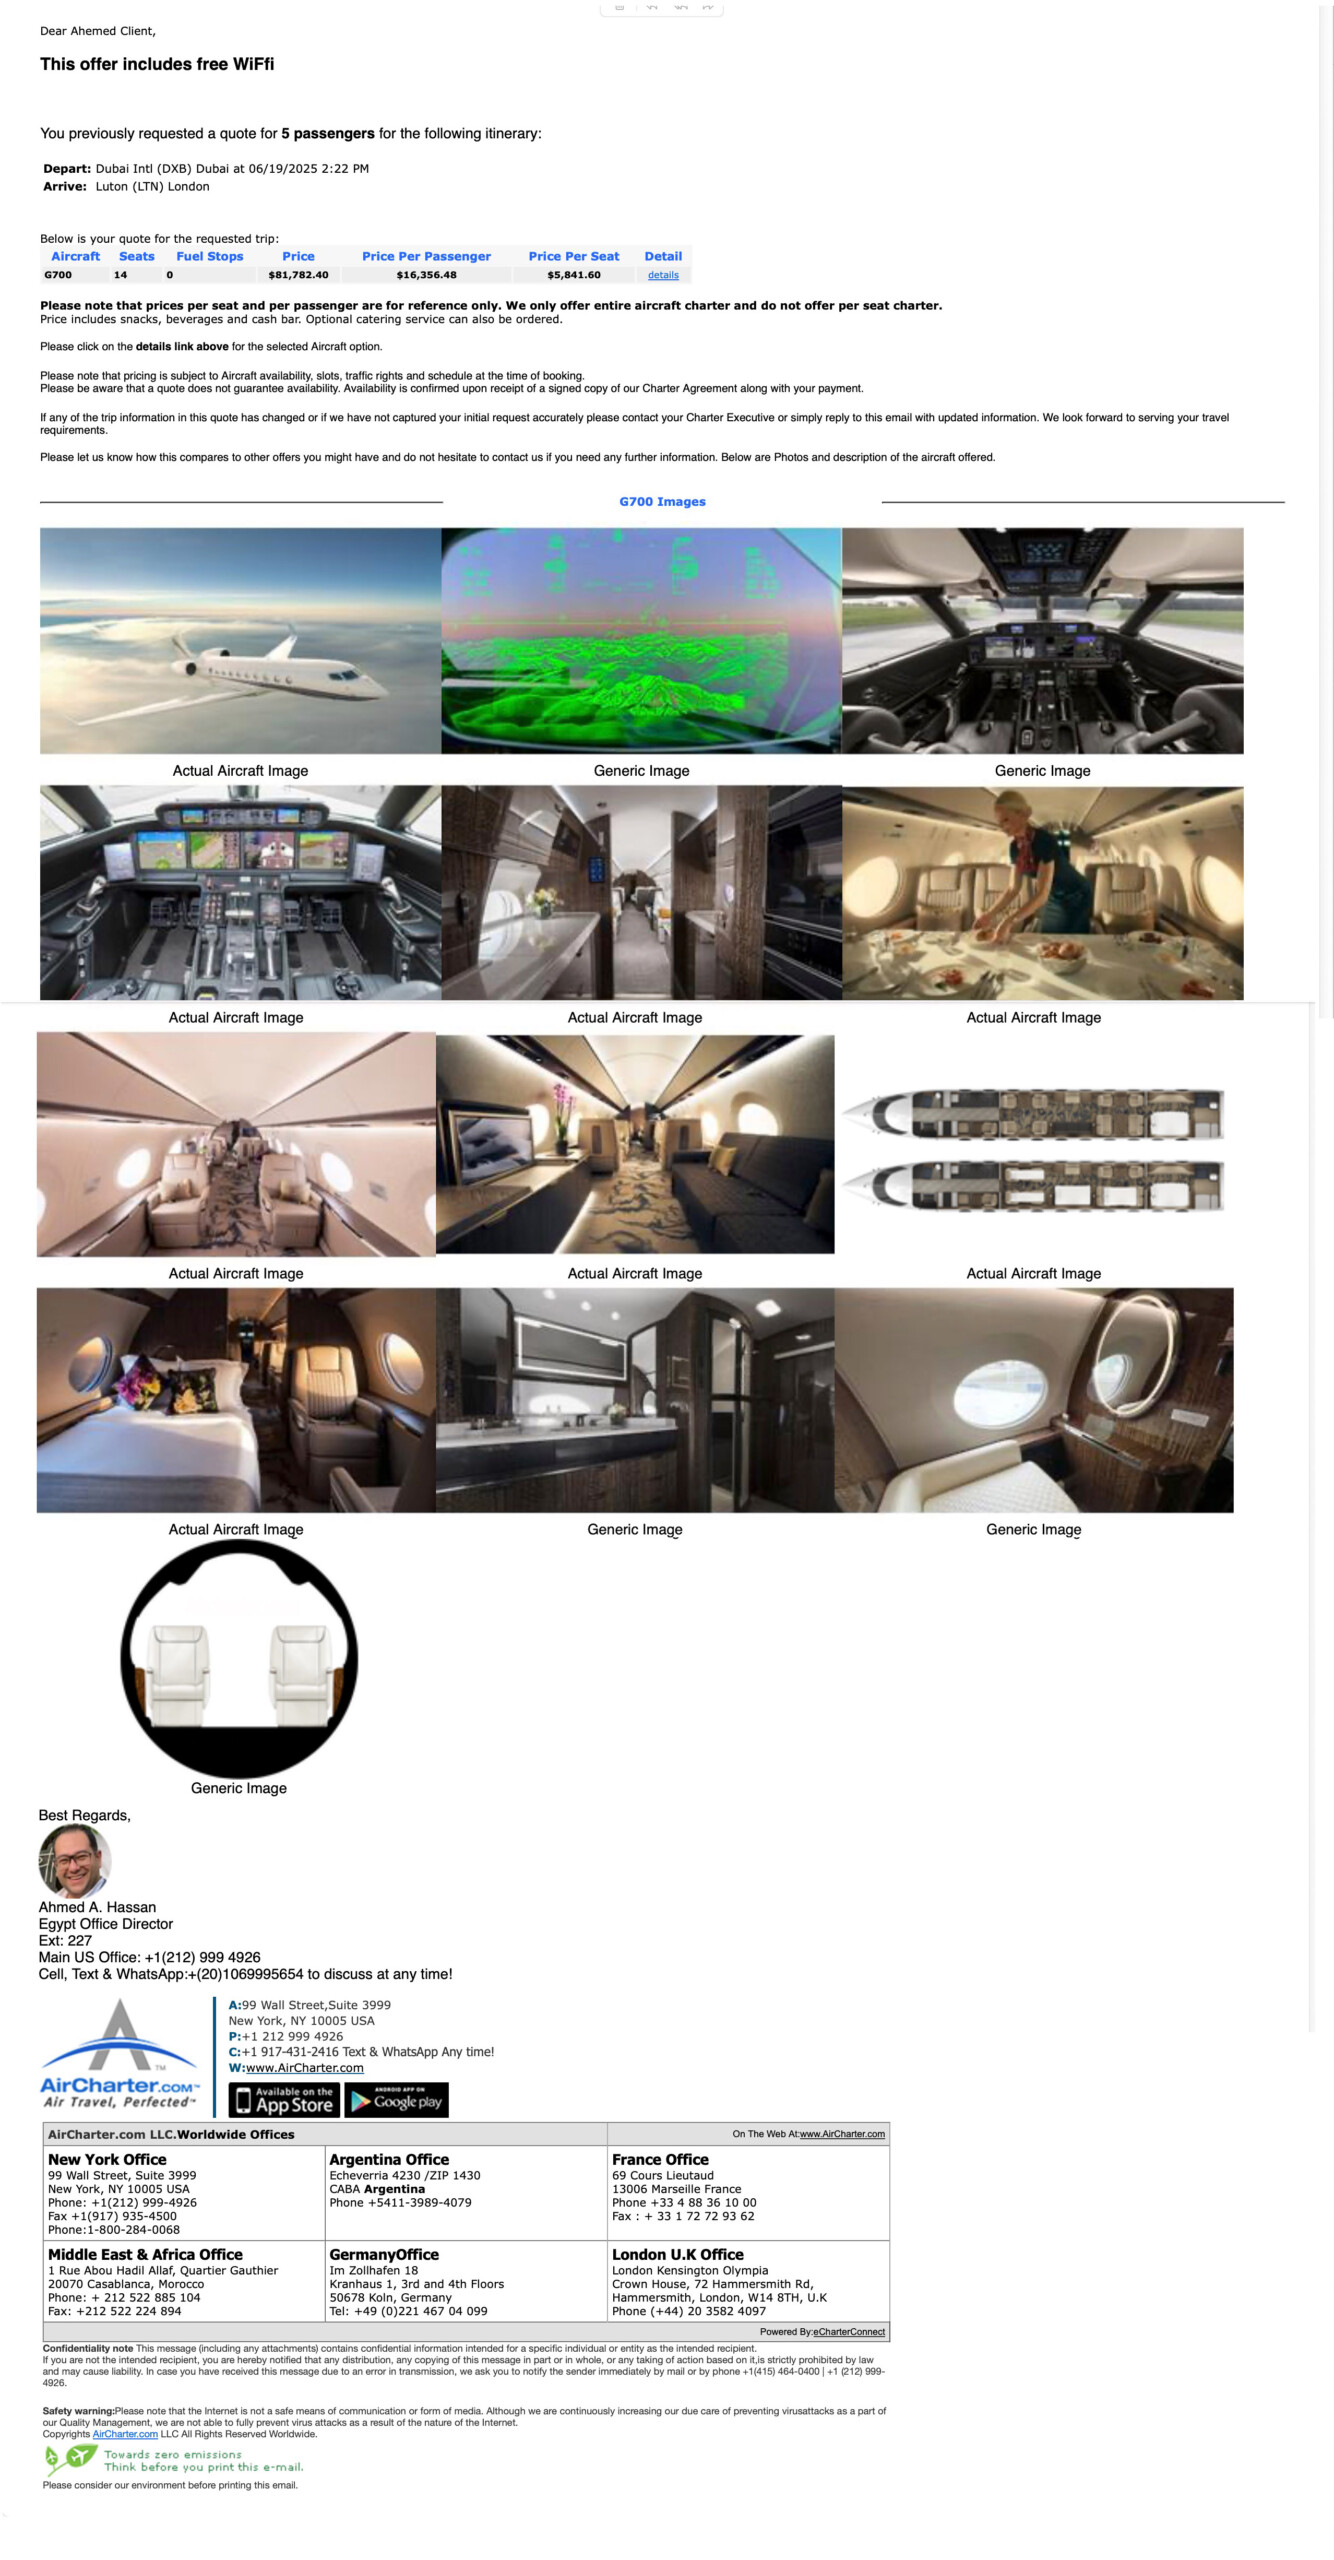
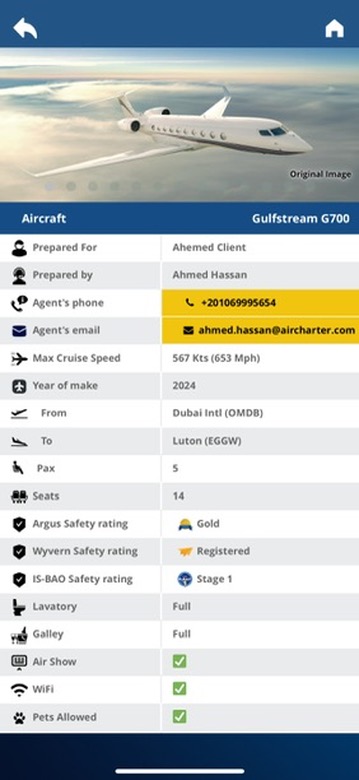
Your client will receive the quote via email, and it will also appear as a quote in their mobile app, clearly displaying your name and contact information as their assigned broker.
(See example screenshot below.)The email includes:Complete flight details
Final pricing with your markup
Your contact information, giving them a direct line to you for questions or to proceed with booking
This ensures a seamless, branded experience for your client with you as their trusted point of contact. -
Trip Status Updates to “Quoted”
Once all quotes are sent:
• The “Details” button turns blue, indicating all offers have been quoted
• No pending offers will remain
• A “Gross Profit” field appears on your screen, showing your earnings
Note: This profit field is only visible to you, never to the client.
-
Client Booking Experience
The client can:
• View the offer in their email, app or on the website
• See screenshot of the quote below
• Proceed to book the trip, with your name and contact info shown as their assigned broker.
 |
 |
 |
 |
|